Folk art inspired halloween + fall nails!
Ombre V, Stripes, small hexagonal glitter, and jewel cabochons
what i used:
O.P.I. - palm springs delight + Love & Beauty - orange for the ombre base
Kiss (striper) - neon orange + Kiss (striper) - bronze for the "V"
Sinful Color (striper) - bad chick + Kiss (striper) - black
Orange metallic hexagonal glitter + red and black jewel cabochons.
Showing posts with label stripes. Show all posts
September 06, 2012
May 03, 2012
purple panel ikat
purple nails ready for spring!


What I used:
O.P.I. - natural nail strengthener
O.P.I. - natural nail base coat
Love & Beauty - lavender
Love & Beauty - sheer purple glitter
Nail Star - white striper (108)
Nail Star - wine striper
Nail Star - black striper (109)
Kiss - soft purple striper
Kiss - bikini pink striper
10 PNL - perfectly clear (401)
and of course my nail design wouldn't feel complete without embellishments!
so i added small soft purple rhinestones at the top and base of my nail design and soft purple nail art beads in a random pattern on my thumb and ring finger for statement nails!
January 29, 2012
Robert Cavalli inspired nails
Got more baggage... inspired by Roberto Cavalli bag from the spring 2012 collection
base color 3 coats O.P.I. - kyoto pearl, Nail Star - black for the stripes and flower outline.
Nail Star - white for the base color of the flowers, and Love & Beauty - royal, L.A. girl F.L.A.R.E. and Love & Beauty - lavender. I finished the design off with Seche Vite - dry fast top coat.
January 16, 2012
teal tie-dye
For this design I wanted to create a sort of died fabric effect using this awesome TEAL color I just received from a friend. All this requires is a base color and a minimum of 3 striper polishes, or 3 colors and thin brush to get this look. Because I was using a green-teal base I chose colors that I felt would compliment but not overpower the base.
After O.P.I. - natural nail base coat I applied 3 layers Milani - fresh teal Next I used Kiss- blue striper to start the dyed pattern, I choose this color because It was similar to the teal, and tied the teal and the rest of the palette together. Next, keeping in mind that I just used blue, I choose Kiss - soft purple striper and followed along the outside of the blue patter. I then did the same with my final color Kiss - red wine striper outside the light purple. I then used 1-2 coats of Seche VITE - fast dry top coat.
December 23, 2011
24 days of XMAS Challenge : Day 22
❄❇❅❆✺❃❉❄❇❅❆✺❃❉❄❇❅❆✺❃❉❄❇❅❆✺❃❉❄❇❅❆✺❃❉
Better late than never... Here are my day 22 of the 24 days of xmas challenge nails, with the theme ELVES or ELF. I wanted create a nail design that could work with this theme without having to do a portrait or a specific object of or relating to elves, although no looking back on it, if i were to redo this design I'd probably do something relating to a toy shop. However I've been making presents all day and therefore I have little energy left for intense nails right now. The part of the elf i drew inspiration from was ELF TIGHTS (or socks, stockings w.e) What is always used in depicting christmas elves, other than pointy ears , being small in height (with the exception of Will Ferrel) and hats are their brightly colored stockings! Some are solid in color, but most are striped and range in mixes of yellow, green, white and red. To make it a little more fun I used a nail polish base and striped with rhinestone cabochons, creating a OMBRE-STONE effect from one nail to the next to try and make the colors work together!
They go as such, from thumb nail to pinky nail.
yellow + red - red +white - red + green - green + white - green + yellow.
Again, starting with the thumb I used Urban Outfitters - orange 3 (its more of a golden yellow than orange) about 3-4 coats, then used red rhinestone cabochons. Next nail I used Ruby Kisses - french White, also 3-4 coats, and then used both red and white rhinestone cabochons to break up the design a little. The middle finger has a Chanel - nirvana, 2 coats (gorgeous color with a light gold luster) and used red and green rhinestone cabochons to ease transition into the next nail. The ring finger uses the same Ruby Kisses - french white, 3-4 coats as a base, and like the index, has white cabochons alternating in, but with green. Finally On the pinky I used the same orange 3, 3-4 coats, and only incorporated green rhinestones for the stripes.
This time I used O.P.I. - top coat instead of my usual Seche VITE.
Unfortunately I broke my pinky nail yesterday so the nail looks disproportional to the others.
WE ARE ALMOST DONE!!! Tomorrow (today) is the last themed nail before a manicure of choice!
Suitably it is SANTA themed nails!
To see more of ELF themed nails check out these ladies blogs:
Thanx for stopping by :)
❄❇❅❆✺❃❉❄❇❅❆✺❃❉❄❇❅❆✺❃❉❄❇❅❆✺❃❉❄❇❅❆✺❃❉
December 15, 2011
24 days of XMAS Challenge : Day 15
❄❇❅❆✺❃❉❄❇❅❆✺❃❉❄❇❅❆✺❃❉❄❇❅❆✺❃❉❄❇❅❆✺❃❉
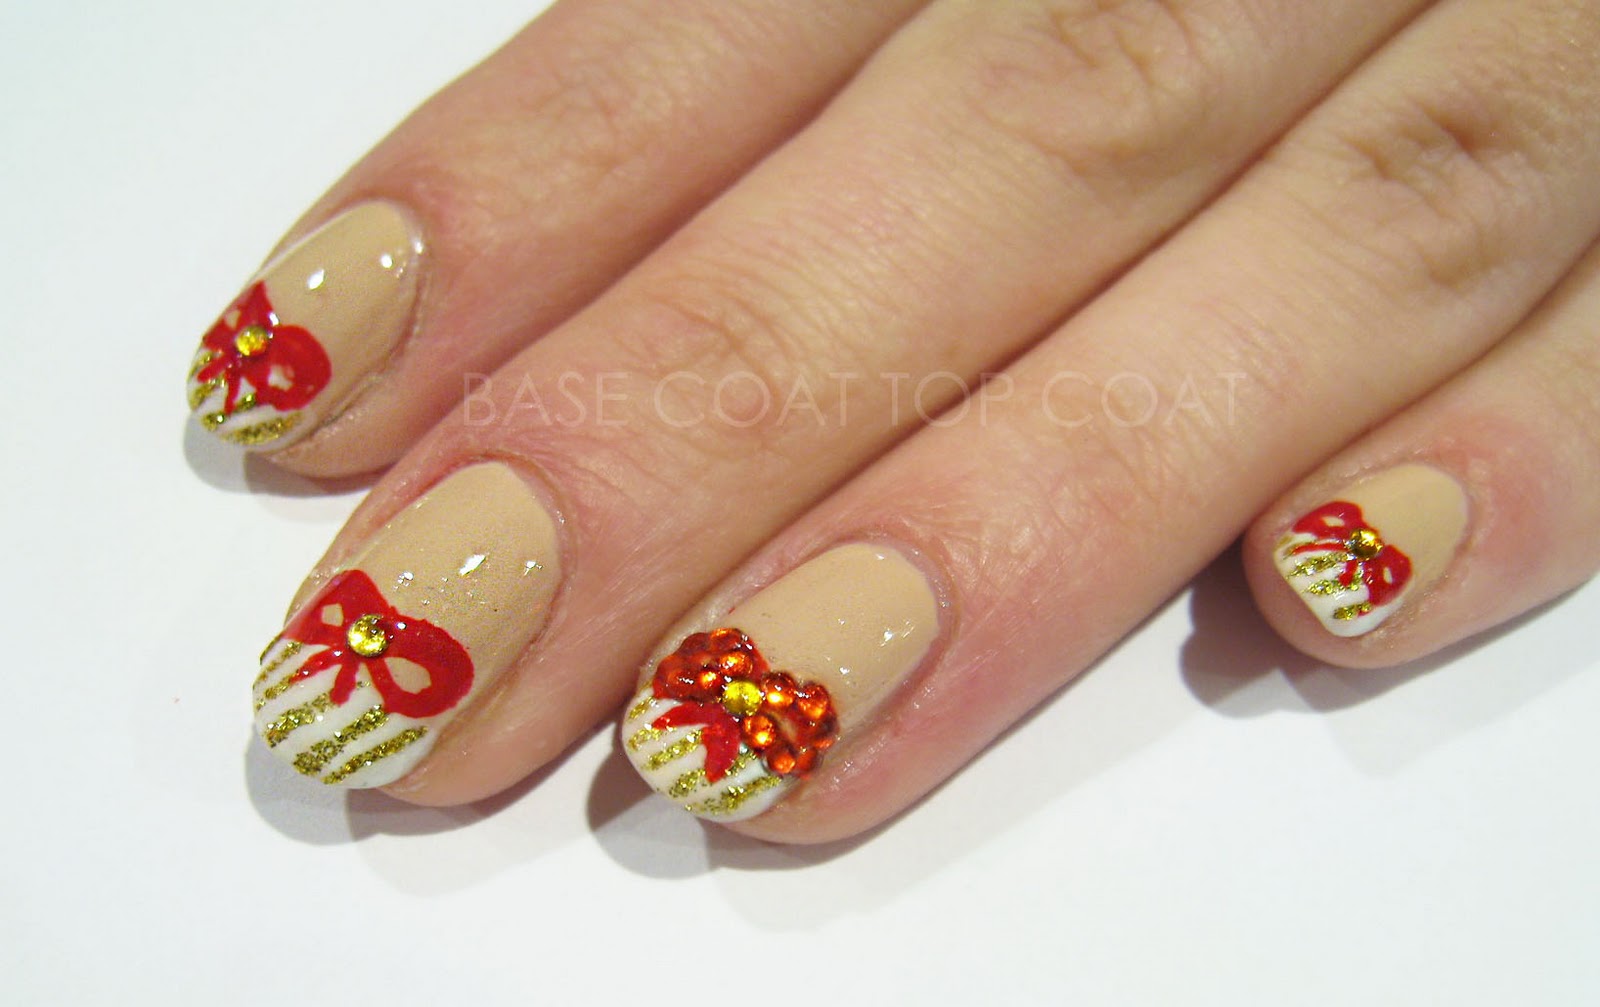
Day 15, can't believe it! Todays theme of the 24 day challenge is PRESENTS!
After yesterdays ornaments I decided to stay simple and keep to a classic design... the french!
I didn't want to use a typical sheer or pale pink base like i have been doing for this challenge but still wanted it to look neutral.
want more PRESENTS check out these ladies blogs:
❄❇❅❆✺❃❉❄❇❅❆✺❃❉❄❇❅❆✺❃❉❄❇❅❆✺❃❉❄❇❅❆✺❃❉
Day 15, can't believe it! Todays theme of the 24 day challenge is PRESENTS!
After yesterdays ornaments I decided to stay simple and keep to a classic design... the french!
I didn't want to use a typical sheer or pale pink base like i have been doing for this challenge but still wanted it to look neutral.
For the base I used Urban Outfitters - nude 5 2 coats. The french tip was done using Ruby Kisses - french white 2 coats. Stripes were done using Kiss - gold glitter striper two coats. Red bows were done using Kiss - red striper. Then to add my favorite thing... BLING I went over the bows on the thumb and ring finger with red rhinestone cabochons and in the center of all the bows are gold rhinestone cabochons, then finally Seche VITE - quick dry top coat.
Stay tuned because tomorrows theme is LIGHTS!
want more PRESENTS check out these ladies blogs:
Thanx for stopping by :)
❄❇❅❆✺❃❉❄❇❅❆✺❃❉❄❇❅❆✺❃❉❄❇❅❆✺❃❉❄❇❅❆✺❃❉
December 08, 2011
24 days of XMAS Challenge : Day 8
❄❇❅❆✺❃❉❄❇❅❆✺❃❉❄❇❅❆✺❃❉❄❇❅❆✺❃❉❄❇❅❆✺❃❉
Day8 of the 24 day xmas challenge! Theme is CANDYCANES! YUM!all i wanted for my candy canes was GLITTER GLITTER GLITTER!
Its hard to tell in these pictures, you can better see it in the second, but these things look AMAZING with direct light! so sparkely! like candy striped ruby slippers!
❄❇❅❆✺❃❉❄❇❅❆✺❃❉❄❇❅❆✺❃❉❄❇❅❆✺❃❉❄❇❅❆✺❃❉
a thick layer of Martha Stewart crafting glitter
Kiss - white stiper
2-3 thick coats of Seche VITE - quick dry top coat
More CANDYCANE nails can be seen HERE:
Thanx for stopping by :)
❄❇❅❆✺❃❉❄❇❅❆✺❃❉❄❇❅❆✺❃❉❄❇❅❆✺❃❉❄❇❅❆✺❃❉
Subscribe to:
Posts (Atom)