Showing posts with label quick//easy. Show all posts

November 18, 2012

Half moon Oil Spill


Another mani for my boyfriends mom!!!

Sinful colors - black on black,  Wet n Wild - greys anatomy  ( awesome purple green iridescent)
White Acrylic polka dots defining the half moon shape, Clear rhinestones at base of nails

January 25, 2012

BLING BLUE!

I've been really into layering embellishments over patterns lately...


For the base color i used Revlon - midnight affair (#791), the leopard was done using Nail Star - pearl blue and Kiss - blue striper. I then used Seche VITE to seal the design. Next I placed the rhinestone cabochons and created false settings around them using gold nail art beads. 

January 16, 2012

teal tie-dye

For this design I wanted to create a sort of died fabric effect using this awesome TEAL color I just received from a friend. All this requires is a base color and a minimum of 3 striper polishes, or 3 colors and thin brush to get this look. Because I was using a green-teal base I chose colors that I felt would compliment but not overpower the base.


After O.P.I. - natural nail base coat I applied 3 layers Milani - fresh teal  Next I used Kiss- blue striper to start the dyed pattern, I choose this color because It was similar to the teal, and tied the teal and the rest of the palette together. Next, keeping in mind that I just used blue, I choose Kiss - soft purple striper and followed along the outside of the blue patter. I then did the same with my final color Kiss - red wine striper outside the light purple. I then used 1-2 coats of Seche VITE - fast dry top coat.

January 12, 2012

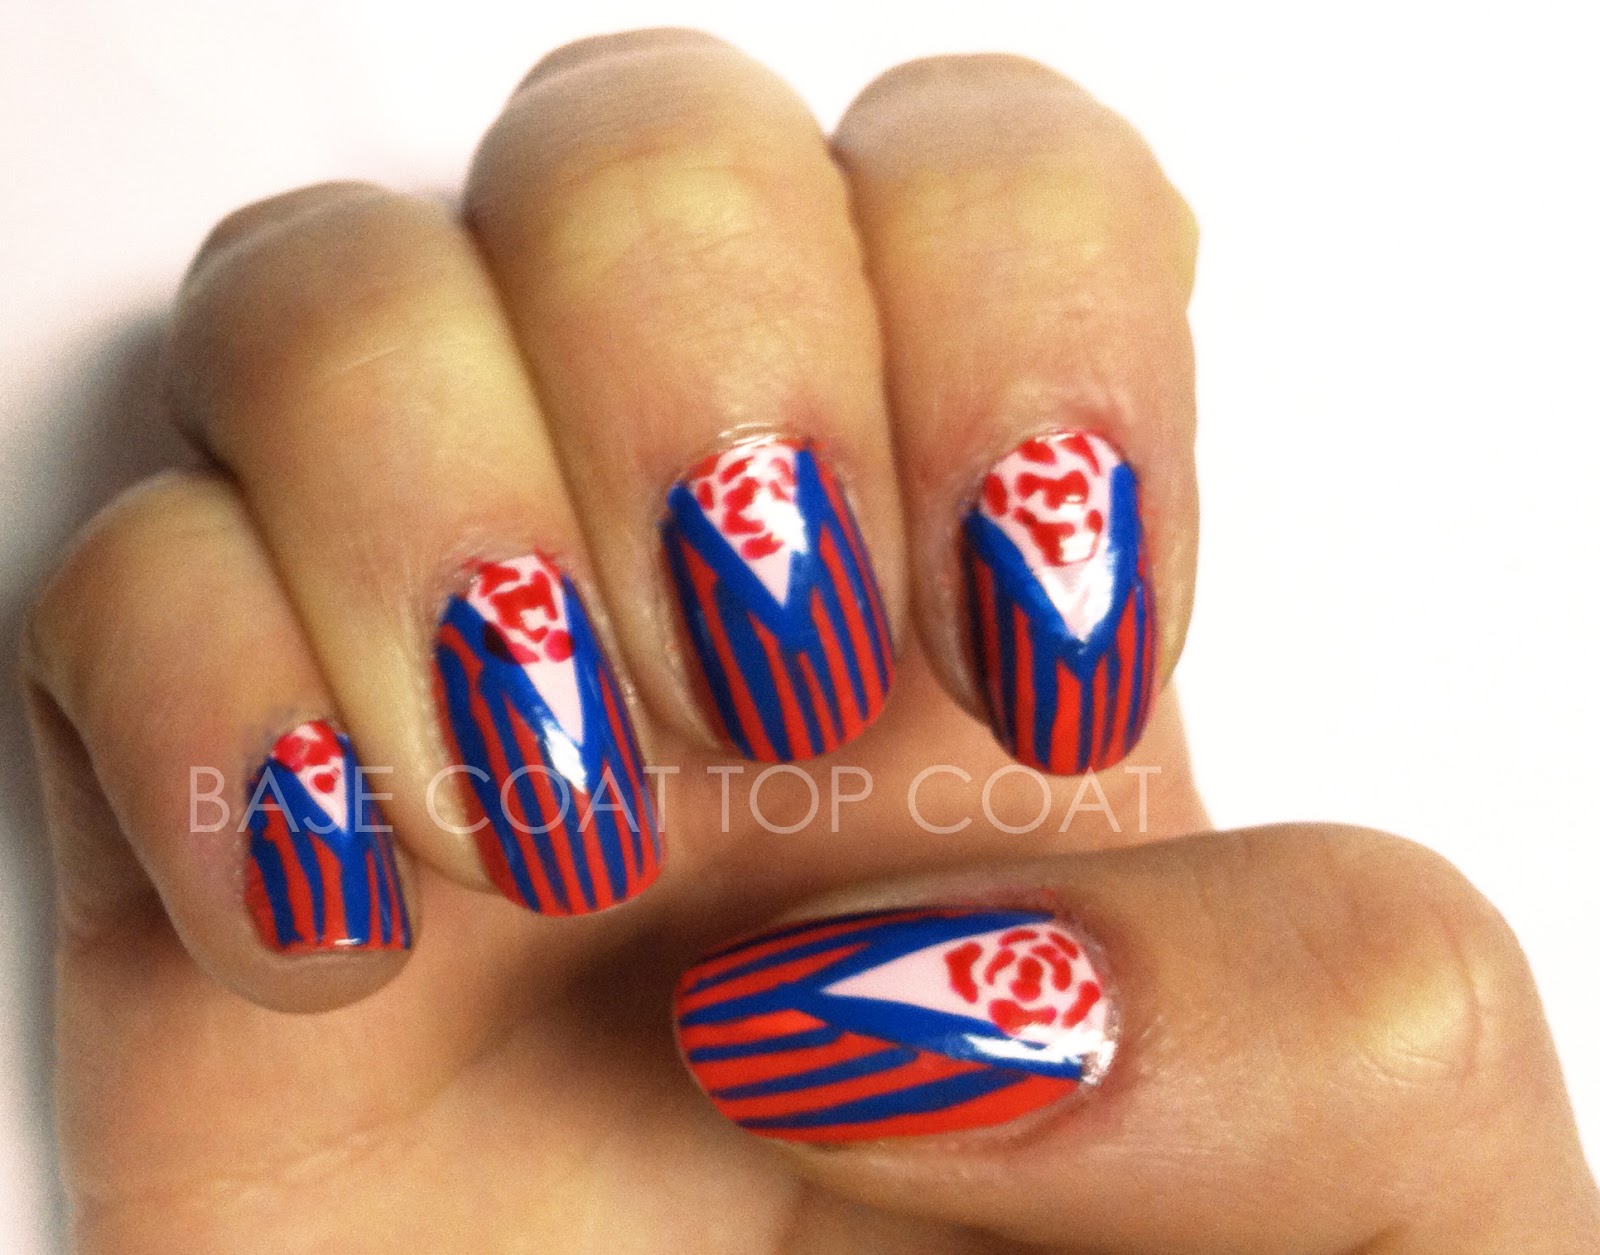
stripe suit

These nails were kind of a random thought. I knew i wanted to  have a pink v-gap with a flower inside, but the blue was chosen soley because red and blue are colors i rarely use together.  I decided that i would use the blue to subdue the intense coral color. I used the blue to outline the Vgap and then added vertical stripes over the coral which from a distance, makes it appear like a color fade from blue to purple to coral. Unfortunately the highlights of the nails are seriously distracting, sorry! and The baby pink triangle was chosen to offset the rest of the design and enhance the directionality of the nail through contrast in color.


The reddish color is Love & Beauty - coral, 3 coats. The baby pink vgap was done using American Apparel - coney island 1 coat. The blue stripes and outline was done using Kiss - blue striper,  and the rose is Nail Star - red.


kelly

January 11, 2012

pink ombre polka dots

Hey guys,

I apologize for being so absent lately, however something so sweet just happened....So i just received a sort of care package jammed in my mailbox from a friend, she gave me 14 nail polishes that she didn't want! So amazing! they've all only been used once or twice too! (thanx Amara! :) )
One of the colors I received was the awesome barbie pink, although i don't wear pink a lot, it is my FAVORITE kind of pink, and i am constantly looking for the perfect barbie pink. Anyways So i decided that I would make an ombre using a second barbie pink! (amazing) and a darker O.P.I. magenta for the tip! This is only my second or third time doing an ombre, an i almost wish it was a more drastic color fade, NEXT TIME.


For the base color I used NYX - flash, 3-4 coats, its a dusty pink creme, that looks super plastic-like on, (i mean that in a good way, of course.) Next using a makeup sponge I added Anise - a bud for you, pink creme, also super fake looking, and really bright. I love this color! Last for the darkest part of the color fade, on the tip, i used O.P.I. - jewel of india, magenta jelly, with a really nice luster.
With the dotting tools my sister got me for christmas, I made my polka dots using Nail Star - white! 
I guess i was feeling girly today?!

thanx for stopping by.

December 29, 2011

Heart

I love the V-GAP  whether it cuts down the center or it creates the sweet heart shape, I think it is so sexy!
the negative space created by the cleavage shape is appealing on the nails , i think mainly do to its suggestive directionality. It really elongates your nails, and well like most things that have that same shape... like... toes... in sexy pumps, it draws you in and creates a contrasting soft but fierce shape.
I added embellishments around the crown of the "V" to accentuate that shape.


After O.P.I. - natural nail strengthener, and O.P.I. -natural base coat (1 coat each) I then applied three coats of Sally Hansen - shell we dance (#160). After those completely dried I used O.P.I. - deer valley spice, for the first time, 2-3 coats, which is a really pretty pinkish red that is really luminous. 

Depending on the light the polish appears more pink or red.

I then added small hexagonal glitters about 6 -10 depending on the finger and at the tip of the gold glitter "V" I added a small gold rhinestone cabochon. I then sealed the design with Seche Vite - dry fast top coat.

I'm really happy with the design and I think its really elegant but still playful so i'll probably be using this heart shaped cleavage design for NYE!


December 28, 2011

Tutorials

Hello all,


Three tutorials are now available for trying out on my TUTORIAL PAGE!


If you try any of these I would love to see images of your results! and I ask that you credit and link back to me!


December 23, 2011

24 days of XMAS Challenge : Day 22

Better late than never... Here are my day 22 of the 24 days of xmas challenge nails, with the theme ELVES or ELF. I wanted create a nail design that could work with this theme without having to do a portrait or a specific object of or relating to elves, although no looking back on it, if i were to redo this design I'd probably do something relating to a toy shop. However I've been making presents all day and therefore I have little energy left for intense nails right now. The part of the elf i drew inspiration from was ELF TIGHTS (or socks, stockings w.e) What is always used in depicting christmas elves, other than pointy ears , being small in height (with the exception of Will Ferrel) and hats are their brightly colored stockings! Some are solid in color, but most are striped and range in mixes of yellow, green, white and red. 

To make it a little more fun I used a nail polish base and striped with rhinestone cabochons, creating a OMBRE-STONE effect from one nail to the next to try and make the colors work together!
 They go as such, from thumb nail to pinky nail.
yellow + red - red +white - red + green - green + white - green + yellow.


Again, starting with the thumb I used Urban Outfitters - orange 3 (its more of a golden yellow than orange) about 3-4 coats, then used red rhinestone cabochons. Next nail I used Ruby Kisses - french White, also 3-4 coats, and then used both red and white rhinestone cabochons to break up the design a little. The middle finger has a Chanel - nirvana, 2 coats (gorgeous color with a light gold luster) and used red and green rhinestone cabochons to ease transition into the next nail. The ring finger uses the same Ruby Kisses - french white, 3-4 coats as a base, and like the index, has white cabochons alternating in, but with green. Finally On the pinky I used the same orange 3, 3-4 coats, and only incorporated green rhinestones for the stripes. 
This time I used O.P.I. - top coat instead of my usual Seche VITE.

Unfortunately I broke my pinky nail yesterday so the nail looks disproportional to the others. 

WE ARE ALMOST DONE!!! Tomorrow (today) is the last themed nail before a manicure of choice!
Suitably it is SANTA themed nails!


To see more of ELF themed nails check out these ladies blogs:

December 19, 2011

24 days of XMAS Challenge : Day 19


Another "nouveau" french design mixed with the 1/2 moon, for day 19 of the 24 day challenge! The theme for today was SANTA HATS, and there were 3 elements i wanted to include fur trim, ball tassel and bells (but in this case, gold nail art beads)


The base coat was done using O.P.I. - i'm not really a waitress, 2 coats
The 1/2 moon and french tip were done with 2 coats of O.P.I. - kyoto pearl, next i put the glitter down over the white parts, but because the red is so powerful and the kyoto is so sheer the snow has a pink tint. The glitter I used is a iridescent white micro glitter which catches the light adding specks of greens and pinks. Next I created a window pattern on the red with gold beads for the "bells," finally a heavy coat of Seche VITE - quick dry top coat


Tomorrow is SLEIGH/SLED themed!


To see more SANTA HATS check out these ladies blogs:

mommicure

Did my moms nails for an xmas party! she never EVER gets designs... and she generally only wears reds and pinks so this was exciting for the both of us.


I used O.P.I. - designer...de better, 2 coats for the base, and then adhered the red and green rhinestone cabochons using 10 Professional Nail Lacquer - perfectly clear (#401), finally a coat of seche VITE - quick dry top coat!
She was so excited, it was awesome! :)

December 18, 2011

24 days of XMAS Challenge : Day 17


Hello hello hello. 

sorry this is a late post. These are my nails from yesterday, I did these then i painted my moms nails for a christmas party and so I became lazy... SO, NOW...here is day 17 of the 24 day challenge! The theme was TINSEL!
I wanted to keep this simple (again) so i did a nouveau french! I incorporated real tinsel, beads and tinsel like glitter polish!


The holo bar glitter tinsel-like base was done using Love & Beauty - black/silver, 3 coats. The one thing i dislike about Love & Beauty nail polish is the naming issue. It's an issue because they name all their colors the same... i.e. al greens are green all reds are reds. RARELY do they name the actual color like lavender or mint, but they seriously need to be a little more creative, a little more descriptive or at the vary least put a freakin' number! For the sake of better description lets just call it black/ holo tinsel! jeeeze :)

ANYWAYS.... next i put a single layer of Sally Hansen X - in the spotlight (#35) which is a clear nail polish with slightly larger and less tinsel per coat, just to add a little size variation.

For the embellishment I used a single strip of real tinsel (from the little bundle in my hand) on the tips of my nails to make it a "french".  Finally i added silver nail art beads in a windowed arrangement to accentuate the silver strip and give it a little more flare.

i'll be posting todays theme a little later, which is STOCKINGS!

want more TINSEL? check out these ladies blogs:
Thanx for stopping by :)


December 15, 2011

24 days of XMAS Challenge : Day 15


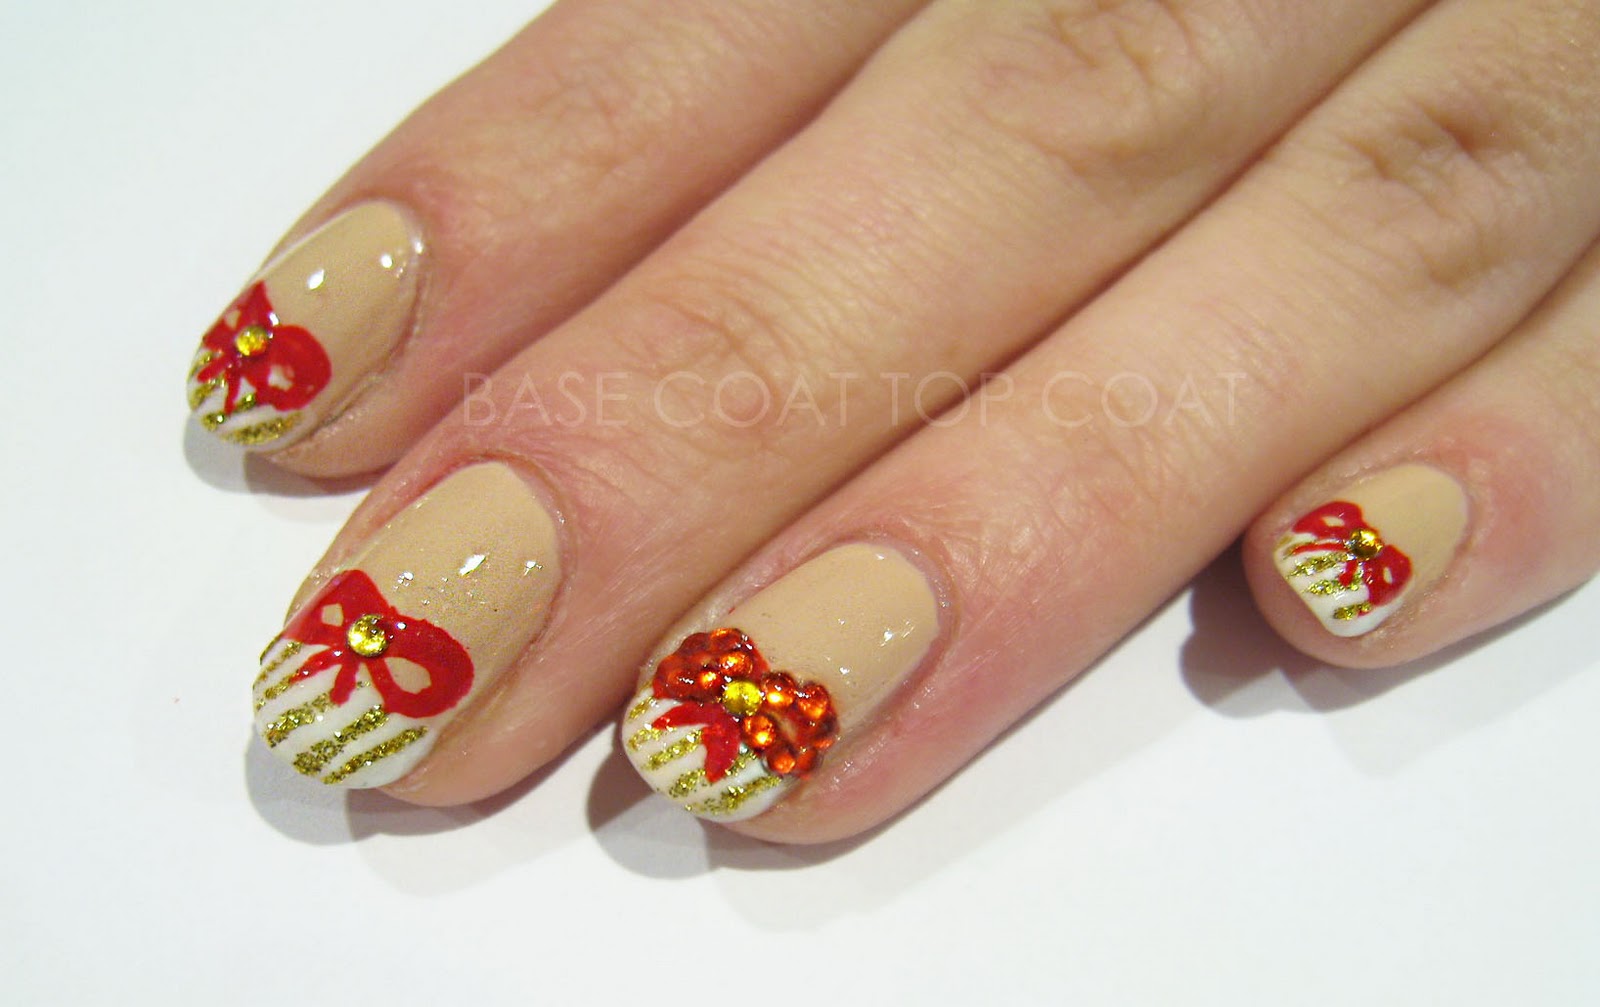
Day 15, can't believe it! Todays theme of the 24 day challenge is PRESENTS!
After yesterdays ornaments I decided to stay simple and keep to a classic design... the french!
I didn't want to use a typical sheer or pale pink base like i have been doing for this challenge but still wanted it to look neutral.


For the base I used Urban Outfitters - nude 5 2 coats. The french tip was done using Ruby Kisses - french white 2 coats. Stripes were done using Kiss - gold glitter striper two coats. Red bows were done using Kiss - red striper. Then to add my favorite thing... BLING I went over the bows on the thumb and ring finger with red rhinestone cabochons and in the center of all the bows are gold rhinestone cabochons, then finally Seche VITE - quick dry top coat.

Stay tuned because tomorrows theme is LIGHTS!

want more PRESENTS
 check out these ladies blogs:
Thanx for stopping by :)


December 11, 2011

24 days of XMAS Challenge : Day 10


Hello, so i'm posting my day 10 late because I spent yesterday traveling to my parents house and was too tired to post my pictures last night. I was inspired by the variety of colors that the poinsettia flower comes in. I also just received my Layla Magneffect - velvet groove (#08) so i wanted to incorporate the color as well as take advantage of the magnetic pull you can get, which would cater to separating the petals. This was my first time using it so it wasn't as successful as i had hoped, but i think it still go the look across.


The base color is Butter london - all hail the queen, the dark purple flowers were done using Layla Magneffect - velvet groove (#08) The red is Revlon - revlon red (#680), the pink were done with O.P.I.- bubble bath, Nail Star - baby pink.
the green leaves were done using Nail Star - dark green glitter, and then for the center of the flowers i placed three gold rhinestone cabochons. Then Seche VITE - quick dry top coat.

More POINSETTIA nails can be seen HERE:
Thanx for stopping by :)


December 10, 2011

24 days of XMAS Challenge : Day 9


Hey guys, sorry no time for posting, i have company and so this is a super rushed and kind of late post.
so these are my RED AND GREEN themed nails. I wanted to do a super drastic color fade and have it be sort of a gothic holiday +  JEN KAO inspired holiday nails.
unfortunately i did not have time to take adequate pictures but this was the best I could do.


What I used is Revlon- red (#680)  and Sinful Colors -HD nails (#926). 
black was done with Ruby Kissed Black Eutopia
and then Seche Vite - quick dry top coat


More RED AND GREEN nails can be seen HERE:
Thanx for stopping by :)


December 08, 2011

24 days of XMAS Challenge : Day 8

Day8 of the 24 day xmas challenge! Theme is CANDYCANES! YUM!
all i wanted for my candy canes was GLITTER GLITTER GLITTER!
Its hard to tell in these pictures, you can better see it in the second, but these things look AMAZING with direct light! so sparkely! like candy striped ruby slippers!


Heres what i used: 10 professional nail lacquer - perfectly clear
a thick layer of Martha Stewart crafting glitter
Kiss - white stiper
2-3 thick coats of Seche VITE - quick dry top coat

More CANDYCANE nails can be seen HERE:
Thanx for stopping by :)